


You've seen it on Instagram, on Pinterest boards, and probably on that one friend who always looks effortlessly put together, a perfectly stacked neck that somehow feels both curated and casual. Learning how to layer gold necklaces is one of those styling skills that looks simple until you actually try it. Chains twist, pendants clump together, and what should look chic ends up looking like a tangled mess in your jewelry box.
The good news? It's not complicated once you know the basics. The right combination of lengths, textures, and weights makes all the difference between a layered look that falls flat and one that turns heads. And because gold-plated jewelry is what we do best at Ezra Gems, pieces designed to hold up through daily wear without tarnishing, we've picked up a thing or two about what actually works when stacking necklaces.
This guide breaks down everything step by step: how to choose your lengths, which styles to mix, how to keep chains from tangling, and a few mistakes to avoid along the way. Whether you're starting with two necklaces or going all-in with four or five, you'll walk away with a clear game plan for nailing the layered look every time.
What you need for a clean, tangle-free stack
Before you start stacking, it helps to know what you're actually working with. Learning how to layer gold necklaces successfully comes down to two things: the right pieces and the right setup. You don't need a massive collection or expensive accessories. A handful of intentional choices upfront saves you from the frustration of untangling chains mid-outfit every morning.
The biggest mistake most people make is grabbing whatever necklaces are nearby and hoping they'll work together. A little planning goes a long way.
The necklaces themselves
Not every necklace plays well with others. Chain weight and width matter more than most people realize. Thin, delicate chains like box chains or cable chains sit flat and stack cleanly. Chunkier styles, like rope or figaro chains, take up more visual space and need room to breathe in the arrangement. When you're building a stack, aim to have at least three distinct chain styles so each layer stands out on its own rather than blending into the one next to it.
Pendants are another element worth thinking through before you start layering. A pendant necklace anchors a layer visually, giving the eye a clear focal point in the middle of the stack. Without at least one pendant in the mix, a stack of plain chains can start to look flat. Pick one or two pendants at most, and let the rest of your layers be clean chains so nothing competes for attention.
Here's a quick checklist of necklace types that tend to layer well together:
- Delicate cable or box chain (14-16 inches): sits closest to the neck
- Thin pendant necklace (18 inches): adds a focal point in the middle
- Rope or twisted chain (20-22 inches): hangs lower and adds texture
- Lariat or longer chain (24+ inches): optional fourth layer for a more dramatic look
A few simple tools that prevent tangling
The necklaces are only half the equation. A necklace layering clasp is one of the most underrated tools for keeping a stack in place. It connects multiple chains at a single clasp point, which means each necklace stays at its designated length throughout the day rather than shifting and crossing over each other. You can find them for a few dollars and they're easy to use with most standard lobster clasps.
Keeping your jewelry on a flat, clean surface while you put it on also cuts down on knots before they even form. Lay each chain out individually rather than picking up a tangled bundle, then put them on one at a time from shortest to longest. A small velvet tray or jewelry dish works perfectly for this. It takes 30 extra seconds and makes a real difference in how the final stack settles.
Step 1. Choose lengths that naturally separate
Length is the single most important factor when figuring out how to layer gold necklaces. If two chains sit at the same length, they stack on top of each other and spend the entire day fighting for position. The goal is to create visible gaps between each layer, typically at least 2 inches apart, so each necklace occupies its own distinct zone on your neckline.
Spacing your lengths at least 2 inches apart is the simplest fix for most tangling problems.
The standard spacing rule
A reliable starting point is the 2-inch spacing rule: each successive necklace in your stack should sit roughly 2 inches lower than the one above it. This gives every chain room to move without crossing into another layer's territory. Start with a 14 to 16-inch choker or collar length as your base, then add an 18-inch, a 20-inch, and optionally a 22 to 24-inch chain if you want a fourth layer.
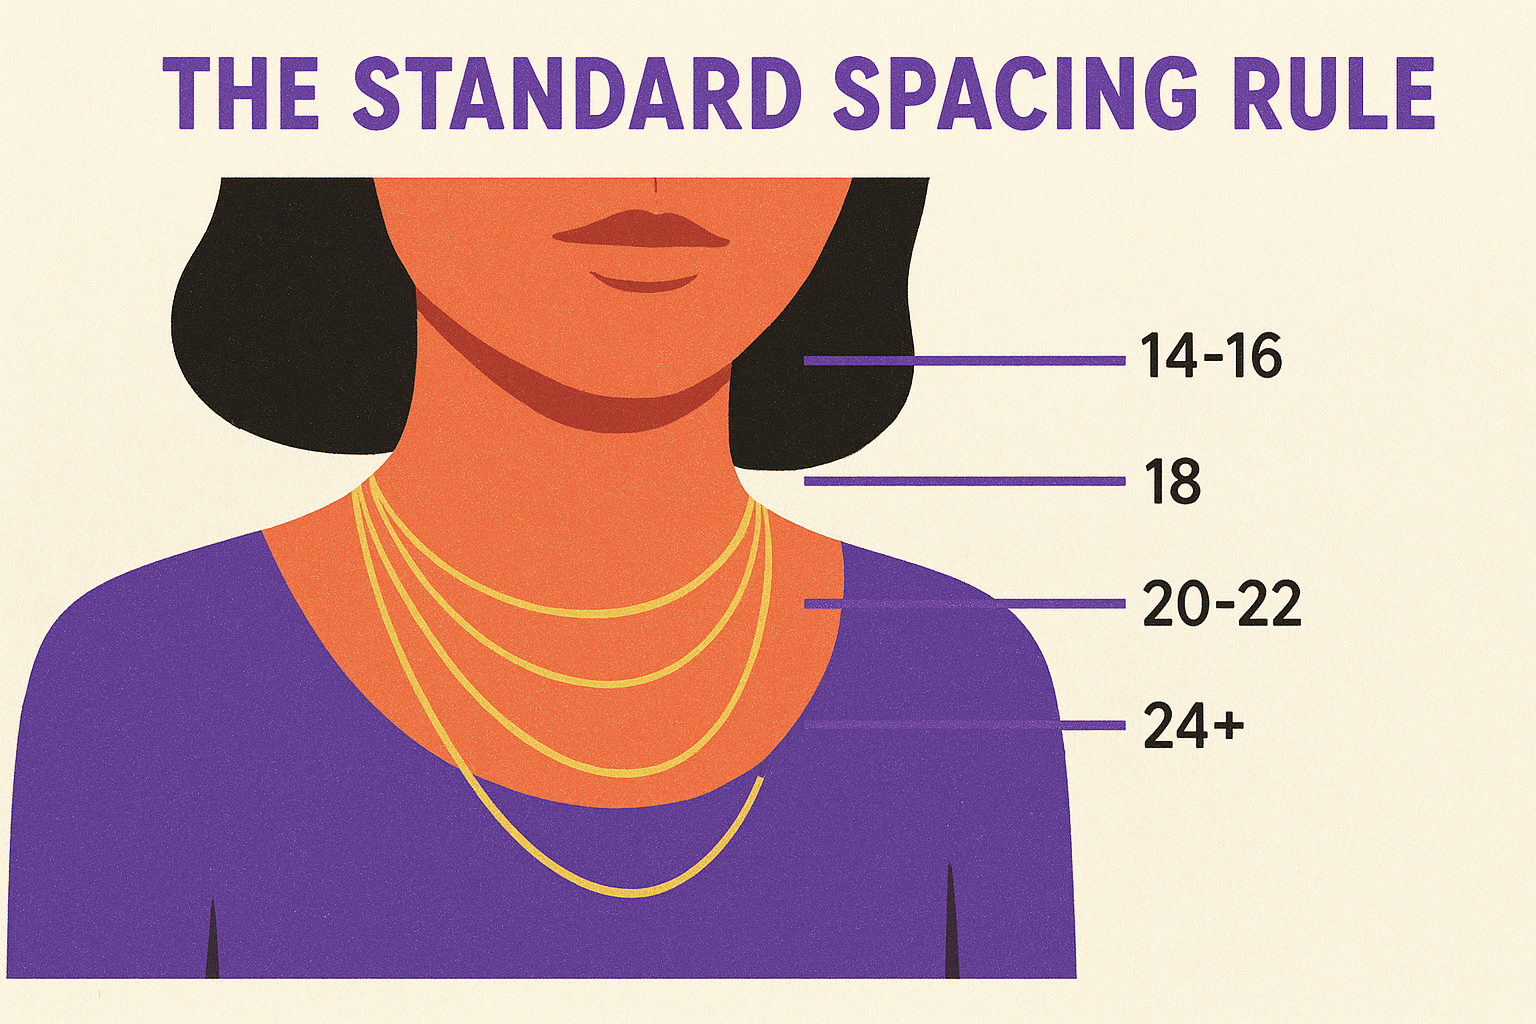
Here's a simple reference for building your layered stack from shortest to longest:
| Layer | Suggested Length | Typical Position |
|---|---|---|
| First | 14-16 inches | Collar / base of neck |
| Second | 18 inches | Just below collarbone |
| Third | 20-22 inches | Mid-chest |
| Fourth (optional) | 24+ inches | Lower chest |
Adjusting for your neckline
Your neckline and clothing affect which starting length makes the most sense. A crew neck or high neckline pushes your starting point lower, so you might begin at 18 inches instead of 14. V-necks and open necklines give you more flexibility to work with a shorter base chain and show off the full spread of the stack. When in doubt, try the stack on before you leave the house to see how each layer actually sits against your outfit.
Step 2. Build contrast with chain styles and pendants
Once your lengths are sorted, visual contrast is what separates a polished stack from a pile of chains. When every necklace looks the same, the layers blur together. The goal in this step is to give each layer its own personality so your eye can actually read the stack from top to bottom.
Chain styles that work well together
The most reliable approach to how to layer gold necklaces with real contrast is to mix chains with different textures and link structures. A flat, smooth cable chain looks very different from a twisted rope chain, even if both are gold and similar in weight. Pairing one flat chain, one twisted chain, and one beaded or figaro chain gives you three visually distinct layers without any single piece looking out of place.
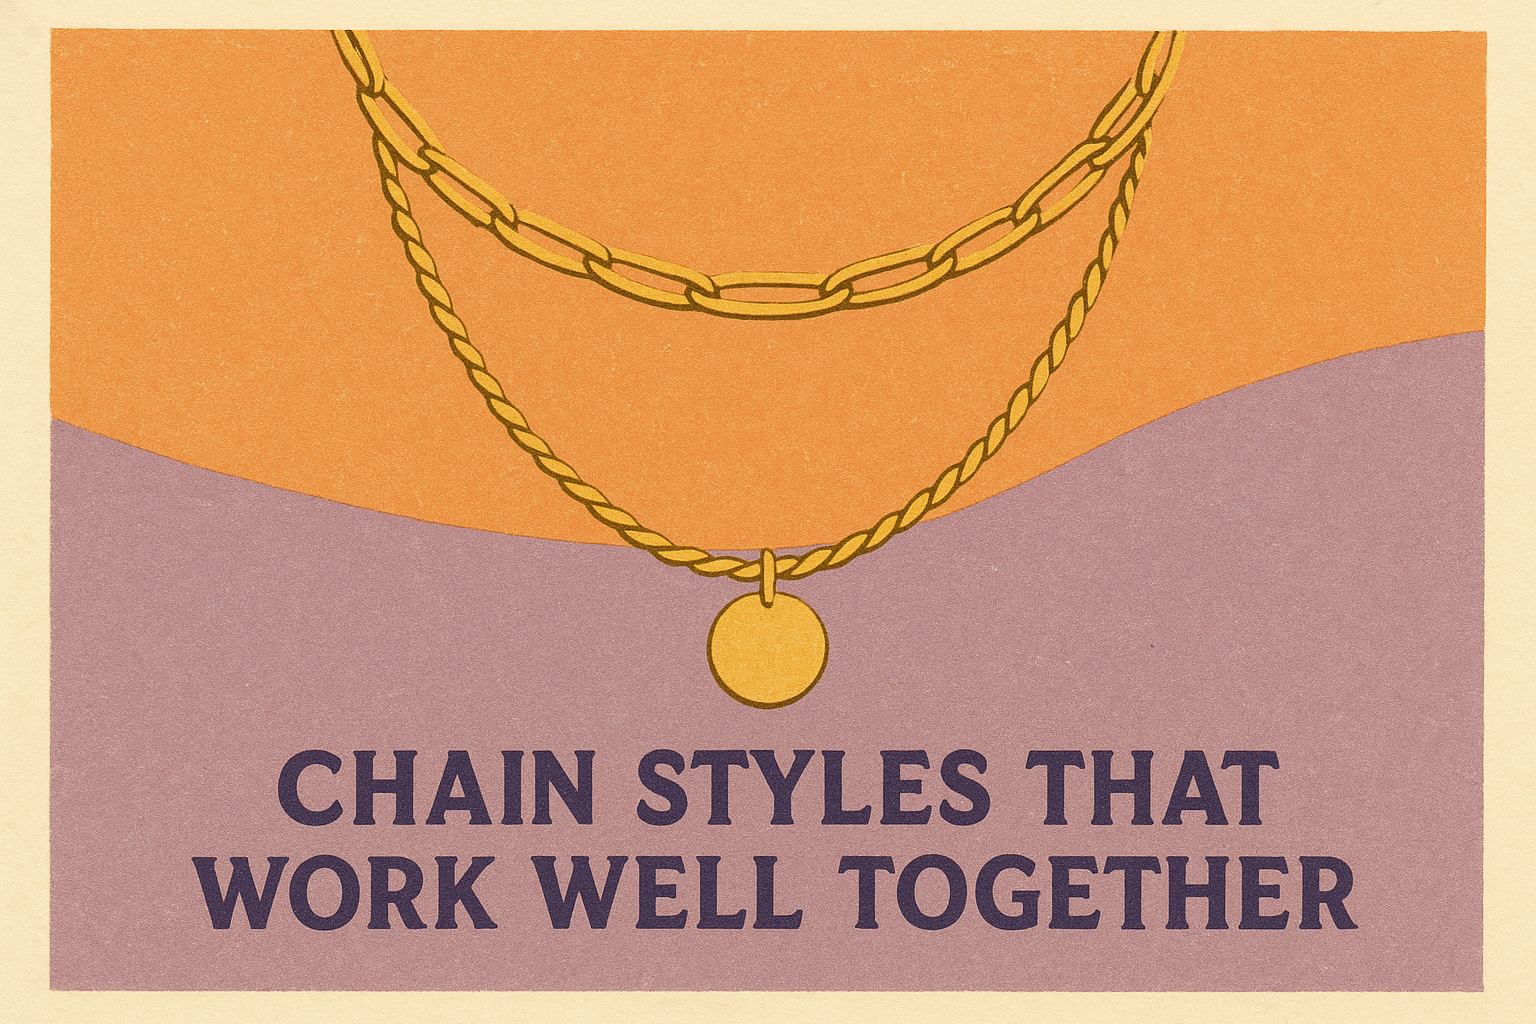
Avoid repeating the same chain style at different lengths; it creates a uniform look that defeats the purpose of layering.
Here are three chain pairings that consistently work well together:
- Cable + rope + figaro: classic combination, easy to find across most jewelry collections
- Box chain + curb chain + beaded chain: modern, geometric contrast with varied textures
- Snake chain + twisted chain + pendant chain: sleek base with movement on the outer layers
How to use pendants without overcrowding
One or two pendants in a stack is the right number for most people. Place your pendant necklace in the middle layer so it sits between two plain chains. This frames the pendant naturally and gives it a clear focal point.
Your pendant size should scale with its position: a small, subtle charm works in the first or second layer, while a larger geometric or statement piece suits the third layer where it has more visual space. Keep the pendant simple in shape so it doesn't clash with the chain textures surrounding it.
Step 3. Use smart hardware and the right order
How you put your necklaces on matters just as much as which ones you choose. Layering clasps and the order you fasten each chain both play a direct role in keeping your stack neat from the moment you put it on until you take it off at night.
Layering clasps and anti-tangle tools
A necklace layering clasp is a small connector that links multiple chains to a single fastening point at the back of your neck. Instead of each necklace moving independently, they all anchor at the same spot, which keeps every chain at its set length throughout the day. Most standard lobster clasps attach directly to a layering clasp without any special tools or modifications.
A layering clasp is the single most effective hardware upgrade you can make for a tangle-free stack.
Here's what to look for when choosing one:
- Single hook with multiple rings: connects two to four chains at once
- Adjustable bar style: lets you fine-tune the spacing between chains
- Gold-tone finish: keeps the hardware consistent with your necklaces so it blends in if it shows
Putting them on in the right order
Knowing how to layer gold necklaces in the right sequence keeps chains from crossing before they even settle. Always start with your shortest necklace first, fastening it completely before picking up the next one. This way, each chain drops into its natural position rather than getting pushed around by the one you're still trying to clasp.
Lay each necklace flat on a clean, smooth surface before you pick it up. Fasten them one at a time, moving from shortest to longest, and give each chain a gentle shake to let it settle before adding the next layer. Rushing this step is where most tangles start.
Step 4. Match your layers to outfits and real life
A great stack on the wrong neckline can disappear or look cluttered, so matching your layers to what you're wearing is the final piece of knowing how to layer gold necklaces well. The same three-necklace combination can look completely different depending on whether you're wearing a V-neck dress or a crew neck sweater, and adjusting your starting length for each outfit makes the difference between a stack that shows and one that gets buried.
Necklines that work best with layering
Open necklines like V-necks, scoop necks, and off-the-shoulder tops give your stack the most visible real estate. Start with a shorter base chain at 14 to 16 inches and let the layers fan out naturally across your chest. Crew necks work better with a starting length of 18 inches or longer so the chains don't disappear under the fabric.
Your neckline determines your starting length more than any other factor.
Here's a quick reference for matching your stack to common necklines:
| Neckline | Recommended Starting Length |
|---|---|
| V-neck | 14-16 inches |
| Scoop neck | 16-18 inches |
| Crew neck | 18-20 inches |
| Turtleneck | 20-24 inches only |
Casual days vs. dressed-up occasions
For everyday wear, keep your stack to two or three chains with one pendant. This stays low-maintenance and reduces the chance of snagging on clothes or bags throughout the day. Lightweight, thinner chains handle movement and daily activity better than heavier statement pieces, so they're the smarter default for work, errands, or running around.
When dressing up for an occasion, you can push to four layers and bring in a larger pendant or a bolder chain style like a figaro or rope. Keep the overall tone consistent in gold so the stack reads as intentional rather than assembled at random.
Quick wrap-up and next steps
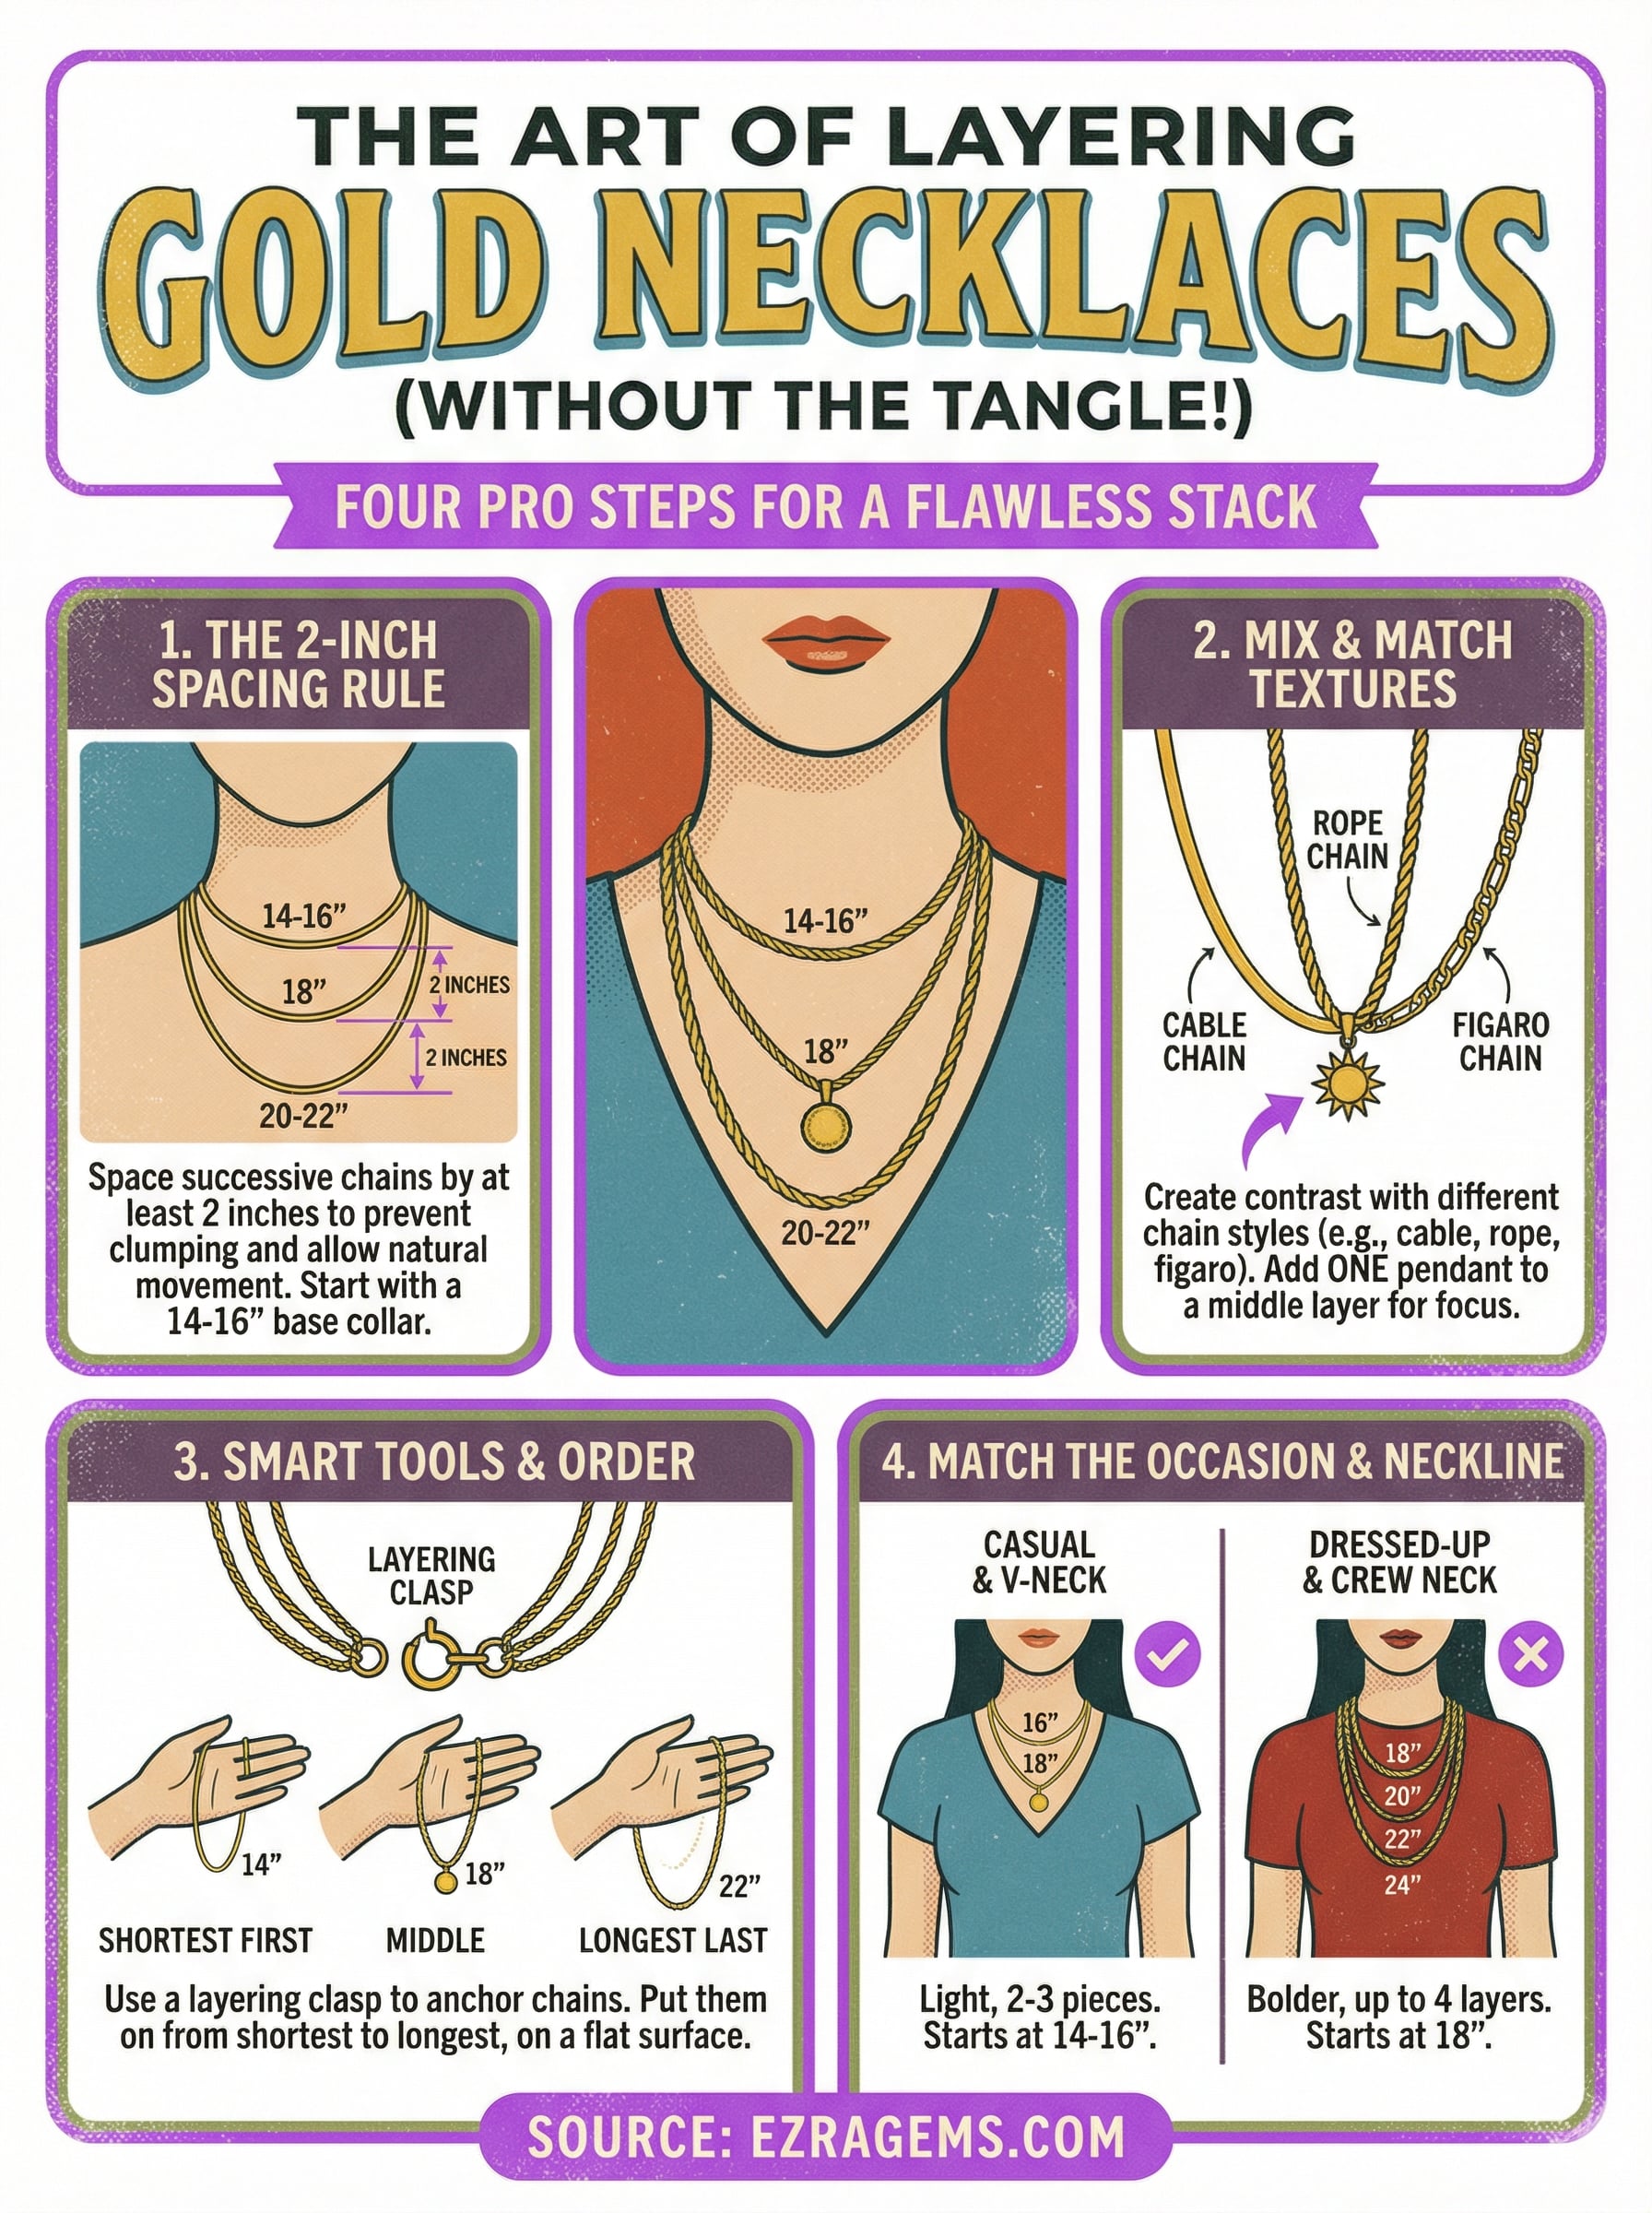
Knowing how to layer gold necklaces comes down to four things: spacing your lengths at least 2 inches apart, mixing chain textures so each layer reads on its own, using a layering clasp to lock everything in place, and adjusting your starting length to match your neckline. None of these steps require a large collection or expensive tools. Two or three well-chosen pieces will always outperform a pile of chains that have nothing to say to each other.
Start small if you're new to stacking. Pick two necklaces at noticeably different lengths, put them on in order from shortest to longest, and see how the pairing feels before adding a third. Once you have the basics down, it's easy to build from there. If you're looking for pieces that are already built for daily wear and easy stacking, browse the gold necklace collection at Ezra Gems and find your next layer.
Leave a comment