


You've probably seen it everywhere, on Instagram, on TikTok, on that one person at brunch who always looks effortlessly put together. Necklace layering is one of those styling techniques that looks simple when done right, but can feel surprisingly tricky when you're standing in front of a mirror with a tangled mess of chains in your hands.
The key to a good layered look comes down to a few things: mixing the right lengths, balancing different textures, and knowing which pieces actually work together instead of competing for attention. Once you understand the basics, you can build combinations that look intentional, not accidental. And the best part? You don't need a huge collection or a big budget to pull it off. Durable, waterproof pieces like the ones we design at Ezra Gems are actually ideal for layering because they hold up to daily wear without tarnishing or turning your skin green, no matter how many you stack.
This guide breaks the process down step by step. You'll learn how to choose complementary lengths, mix metals and textures with confidence, and avoid the most common layering mistakes. Whether you're building your first layered set or refining a look you already love, every tip here is practical and easy to apply right away.
What necklace layering is and why lengths matter
Necklace layering is the practice of wearing two or more necklaces at the same time, arranged so each one sits at a distinct level on your chest or collarbone. Done well, it creates depth and visual interest that a single necklace simply can't achieve. Done poorly, it looks cluttered and hard to read. The difference almost always comes down to one thing: length spacing.
What counts as a layered look
A layered look doesn't mean throwing on every necklace you own. It means choosing pieces that sit at clearly different points on your body so your eye moves naturally from one layer to the next. A well-built set reads as a single, cohesive statement, even though it's made up of individual pieces working together.
Most styling guides recommend a minimum gap of 2 inches between each layer. That spacing gives each necklace room to register on its own and prevents them from sitting on top of each other. When two necklaces are too close in length, they compete rather than complement, and the look falls apart before you've even left the house.
How necklace length measurements work
Necklace lengths follow a fairly consistent sizing system, measured in inches around the full circumference of the chain. Here's a quick reference for where each standard length typically sits on the body:
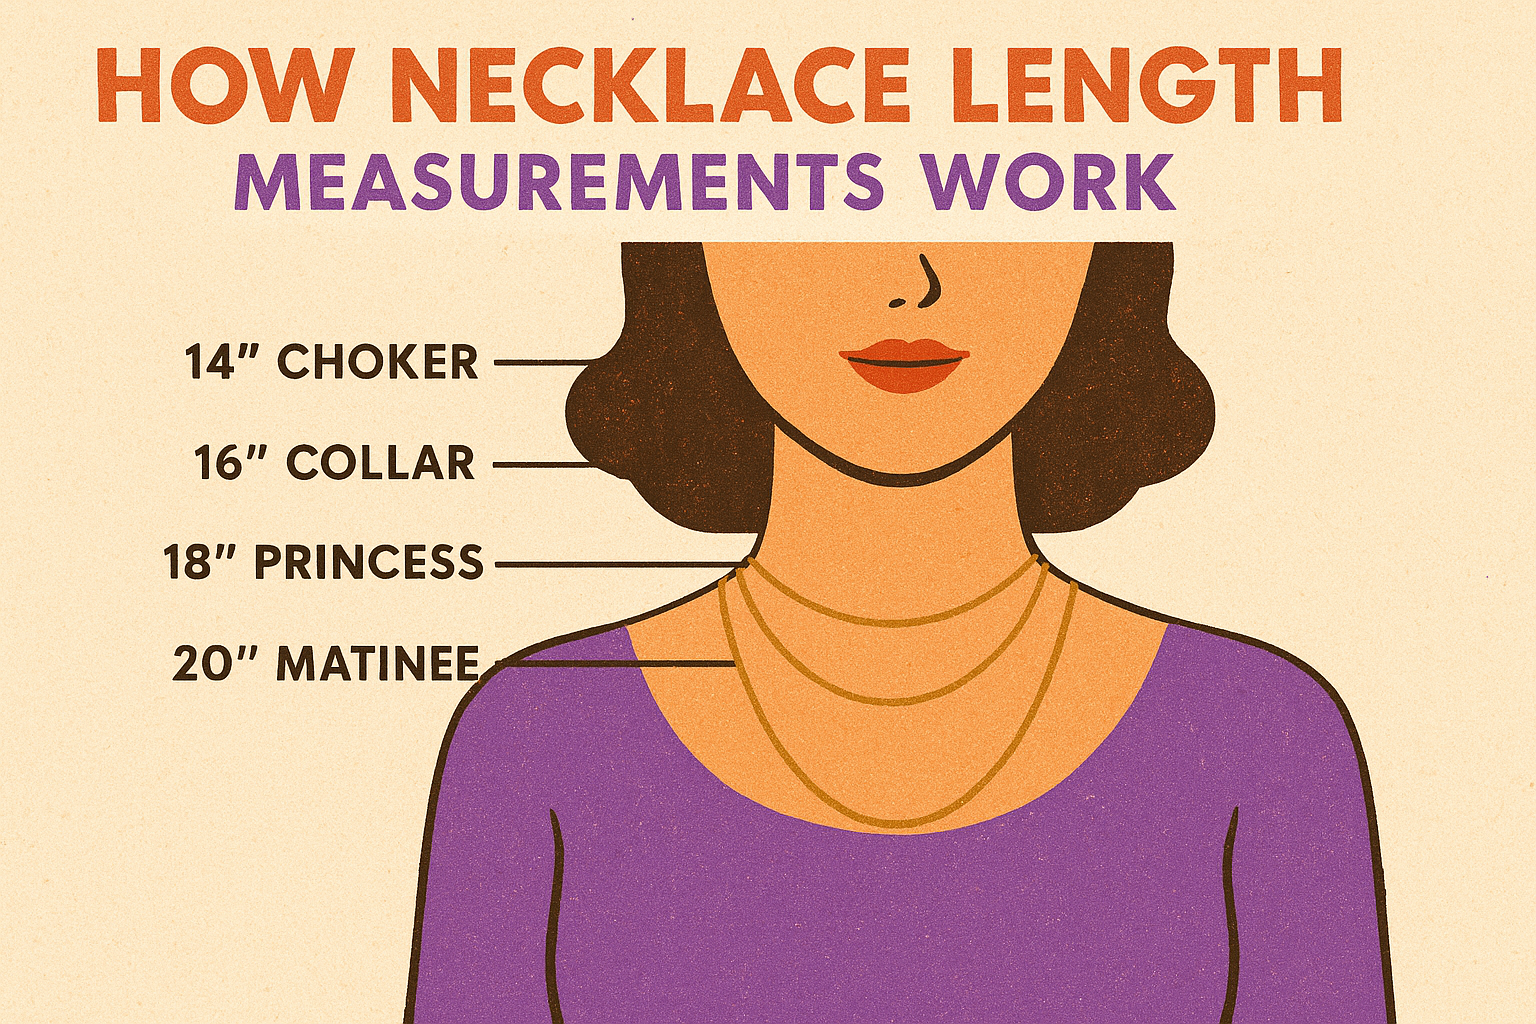
| Length | Common Name | Where it sits |
|---|---|---|
| 14" | Choker | Tight at the base of the neck |
| 16" | Collar | At or just below the collarbone |
| 18" | Princess | Just below the collarbone |
| 20" | Matinee | Mid-chest |
| 24" | Opera | Lower chest or sternum |
| 30"+ | Rope | Stomach or below |
Your starter layer sets the tone for everything else, so get that first fit right before you add anything on top.
Understanding these measurements gives you a concrete framework to build from instead of guessing by eye. You can look at a necklace's listed length and immediately know roughly where it will fall on your body, which makes planning a layered combination far more precise and intentional.
Why lengths create the visual impact in necklace layering
The reason length spacing matters so much in necklace layering is purely visual. Your eye naturally follows lines, and layered necklaces create a series of horizontal lines across your chest. When those lines are evenly spaced, the effect feels balanced and deliberate. When they bunch together, the eye can't distinguish the individual pieces, and the whole look reads as one tangled mass.
Spacing also controls how much attention each layer gets. A choker at 14 inches paired with a pendant at 20 inches draws the eye downward in a clean, deliberate path. Add a third layer at 24 inches and you've built a visual triangle that frames your neckline without overwhelming it. That's the core logic behind most well-executed layered looks.
Different chain styles add another dimension on top of length. A delicate cable chain at 16 inches, a slightly chunkier rope chain at 18 inches, and a pendant at 22 inches don't just sit at different heights. They also add texture and weight variation that makes the overall combination feel considered rather than accidental. Length is the starting point, but it works together with chain style and proportion to build something that actually holds together when you wear it.
Step 1. Measure fit and choose your starting length
Your starting layer is the anchor for everything else you build on top of it. Getting this first necklace wrong means every piece you add after it will fight for space rather than add to the look. Before you reach for a second or third chain, take a few minutes to figure out exactly where your first necklace needs to sit and why.
How to measure your neck at home
Grab a flexible measuring tape (the kind used for sewing), wrap it around the base of your neck, and note the measurement. That number is your baseline. From there, you add inches to determine where a necklace will actually fall on your body. If your neck measures 13 inches, a 16-inch necklace will sit about 1.5 inches below your collarbone, not flush against it the way a 14-inch choker would.
Measuring your own neck takes less than a minute and saves you from ordering a necklace that sits nowhere near where you expected it to.
If you don't have a measuring tape, a piece of string and a ruler work just as well. Measure the string against the ruler after you've marked the length around your neck. Write the number down so you can reference it when you're reading necklace sizing charts or shopping online.
Choose your anchor length based on your neckline
Your starting necklace should frame your neckline rather than compete with it. Here's a simple reference to help you match your anchor layer to what you're wearing:
| Neckline style | Best starting length | Why it works |
|---|---|---|
| Crew neck | 18" Princess | Sits just below the collar edge |
| V-neck | 16" Collar | Echoes and extends the V shape |
| Off-shoulder | 20" Matinee | Creates a visual focal point below the collarbone |
| Scoop neck | 18" or 20" | Fills the open space without crowding the neckline |
| Turtleneck | 24" Opera | Long enough to layer over the fabric |
Once you've locked in your anchor piece, you have a clear starting point. Every necklace you add next will be measured against this first layer, so the fit and placement of your foundation drives the success of the whole layered combination.
Step 2. Add a second necklace with clean spacing
Once your anchor layer is set, adding a second necklace comes down to one principle: clear visual separation. The second piece needs to sit far enough below your first that both chains are distinctly readable on their own. Most people grab whatever looks nice and layer it on, then end up with two chains sitting almost on top of each other, blurring into a single tangled line. That's the problem clean spacing solves before it starts.
A solid rule for necklace layering at this stage is a gap of 2 to 4 inches between your anchor and your second layer. If your first necklace sits at 16 inches, your second should land at 18 to 20 inches at minimum. That spacing gives each piece its own visual lane and ensures both layers contribute to the overall look rather than canceling each other out.
Keep at least 2 inches between layers
The 2-inch minimum is not arbitrary. When two necklaces sit closer than 2 inches apart, they tend to stack directly on top of each other throughout the day, especially when you move, lean forward, or sit down. The result is a single lumpy-looking line instead of two distinct layers.
The moment your second necklace blends into your first, both pieces stop working.
Use this spacing guide to pick your second length based on your anchor:
| Anchor length | Minimum second length | Ideal second length |
|---|---|---|
| 14" choker | 16" | 18" |
| 16" collar | 18" | 20" |
| 18" princess | 20" | 22" |
| 20" matinee | 22" | 24" |
Match the second necklace to your anchor piece
Your second necklace doesn't need to match your anchor exactly, but it should complement its weight and proportion. If your first layer is a fine delicate chain, your second should be either similar in delicacy or slightly more substantial. Jumping from an ultra-thin chain to a very thick piece in one step creates visual whiplash rather than a smooth progression.
Think about pendant versus plain chain as well. If your anchor already has a pendant or focal detail, a simple chain at the second layer keeps the combination from feeling too busy. Alternatively, if your anchor is a plain chain, adding a small pendant at the second layer gives the eye a landing point and brings interest without cluttering the overall look.
Step 3. Add a third layer and set a focal point
Adding a third necklace is where necklace layering moves from straightforward to genuinely impressive, and where most people also make their biggest mistakes. At this stage, the risk is overcrowding. Three chains at similar lengths with similar weights look like a tangled cluster, not a styled set. Your job with the third layer is to extend the spacing you've already built and introduce a clear focal point that gives the eye somewhere to land.
Lock in your third length first
Before you pick up a third necklace, check your existing spacing. If your anchor sits at 16 inches and your second layer sits at 20 inches, your third needs to land at 24 inches or longer. That 4-inch gap keeps the visual separation intact across all three pieces and prevents the lower two layers from merging into each other throughout the day.
Use this reference to extend your layered set by a third piece:
| Anchor | Second layer | Third layer |
|---|---|---|
| 14" choker | 18" princess | 22" or 24" |
| 16" collar | 20" matinee | 24" opera |
| 18" princess | 22" | 26" or 28" |
If you can't fit a third necklace without breaking the 2-inch spacing rule, skip it. Two well-spaced layers always beat three crowded ones.
Set one piece as the focal point
Your focal point is the piece that pulls the most visual attention. In a three-layer set, this is usually your longest necklace, especially if it carries a pendant, charm, or a more substantial chain. The longer length naturally draws the eye downward and gives the entire look a finishing anchor point.
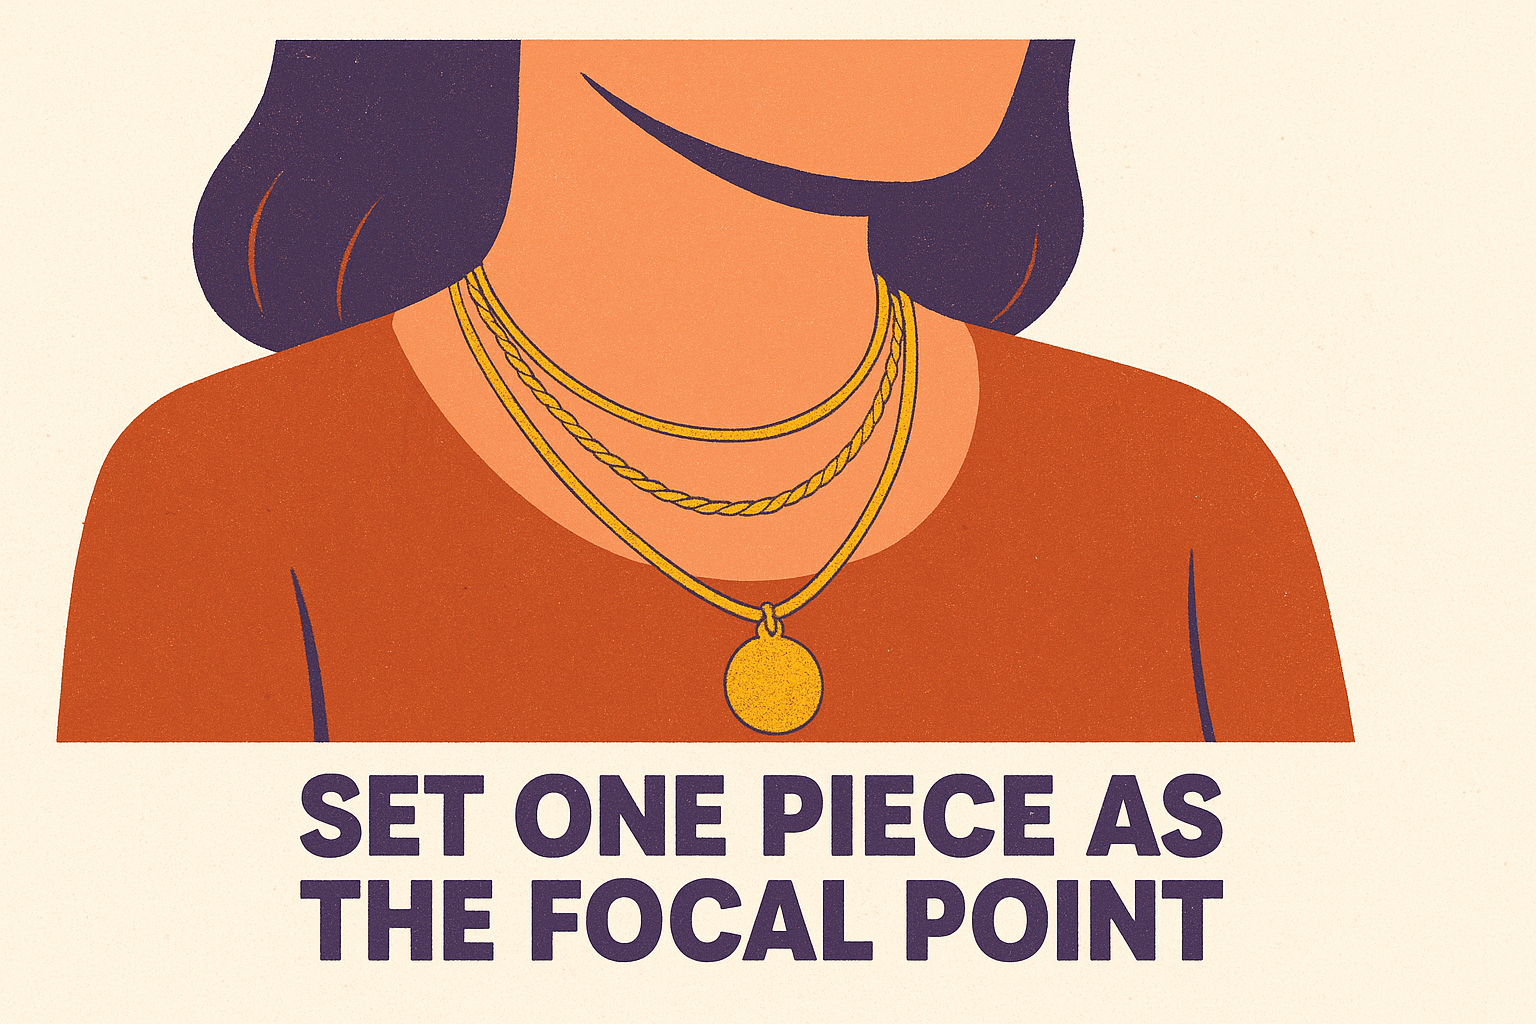
Pick only one focal piece per layered look. If all three necklaces compete for attention equally, none of them win. A useful formula is: one simple chain at the top, one slightly more textured chain in the middle, and one piece with a pendant or distinctive detail at the bottom. This graduated approach lets each layer play a specific role instead of three pieces fighting over the same space on your chest.
Step 4. Mix chains, pendants, and metals on purpose
Once your lengths are locked in, the next layer of decision-making in necklace layering is what each piece actually looks like and how those individual styles work together. Grabbing three random chains and stacking them produces a look that feels accidental. Choosing each element with a clear reason produces a look that feels styled. The difference comes down to understanding a few straightforward principles about chain styles, pendants, and metals before you start combining them.
Mix chain styles with a clear visual logic
Your chains don't all need to match, but they should follow a consistent progression. A practical approach is to vary one element at a time: change the texture while keeping the weight similar, or shift the weight slightly while keeping the texture minimal. Changing both texture and weight at once between adjacent layers creates too much contrast and breaks the visual flow you've been building.
Follow this mixing formula as a starting template:
| Layer position | Chain style | Why it works |
|---|---|---|
| Top (anchor) | Fine cable or box chain | Creates a clean, light base |
| Middle | Slightly chunkier rope or figaro chain | Adds texture without overpowering |
| Bottom (focal) | Pendant or statement chain | Gives the eye a clear resting point |
This graduated structure lets each piece play a distinct role while still reading as a unified set. Think of it as building a visual hierarchy where the eye moves downward naturally from the lightest chain to the most detailed one.
Mix metals without making it look accidental
Gold and silver can work together in a layered set, but only when you repeat each metal at least twice across the stack. One silver chain surrounded by two gold ones looks like a mistake rather than a choice.
Repeating a metal tone at least twice signals to anyone looking that you meant to mix them.
A reliable approach is to pick one dominant metal and one accent metal. Let the dominant tone appear on your anchor and one other layer. Use the accent metal on your focal piece, such as a pendant or a chain with a distinct finish. This keeps your overall palette balanced and readable without forcing you into a single metal tone across the entire look. If you want an easier solution, two-tone pieces that combine gold and silver in a single chain naturally bridge both metals across your layers without requiring any additional calculation.
Step 5. Stop tangles and keep layers separated
Tangles are the most frustrating part of necklace layering in practice. You build a beautiful combination at home, put it on, and by midday every chain has knotted around the others into a single mass that takes ten minutes to separate. The good news is that tangles are almost entirely preventable with a few specific habits and one or two inexpensive tools that most people overlook entirely.
Use a layering clasp to lock your chains in place
A layering clasp, sometimes called a multi-strand clasp, is a single fastener that holds multiple necklaces at a fixed distance from each other at the back of your neck. You clip each chain's individual clasp onto the layering clasp instead of fastening each one separately. The chains hang parallel to each other rather than rotating and crossing throughout the day as you move.
A layering clasp is the single most effective tool for keeping stacked necklaces separated from morning to night.
You can also use a sliding spacer bar, which threads through multiple chains and keeps them physically separated along their full length, not just at the clasp point. Both tools are widely available and cost under fifteen dollars for a basic set. Here's a quick comparison to help you choose:
| Tool | Best for | How it works |
|---|---|---|
| Layering clasp | All chain types | Locks chains at one anchor point at the back |
| Sliding spacer bar | Longer chains | Separates chains at multiple points along the length |
Put your necklaces on in the correct order
The order you put your necklaces on directly affects how they behave throughout the day. Always start with your longest necklace and work upward toward your shortest. Putting the shortest piece on first and then trying to feed longer chains over your head causes the shorter chain to act as a barrier, and longer chains wrap around it almost immediately.
Lay each chain flat against your chest before fastening the next one. Run your fingers along the full length of each layer after you put it on to confirm it's lying flat and not already looped around the chain above it. That five-second check before you walk out saves you from a full untangle session later in the day. If you notice two chains crossing at the front, separate them immediately rather than waiting and hoping they'll settle on their own.
Style your layers to match necklines and outfits
The necklace combination that looks perfect with one outfit can fall completely flat with another. Necklace layering works best when your chain lengths and proportions respond to the specific neckline you're wearing, not just to your overall jewelry preferences. Two quick decisions, matching your layers to your neckline and adjusting your setup for the occasion, will keep your layered look working across everything in your wardrobe.
Match your layers to your neckline
Your neckline defines the visual frame your necklaces sit inside. A crew neck pushes your lowest visible layer up toward your collarbone, which means your spacing needs to start higher and compress slightly to keep all three layers within the visible frame. A deep V-neck opens up more chest space, which lets you spread your layers out with wider gaps and longer chains.
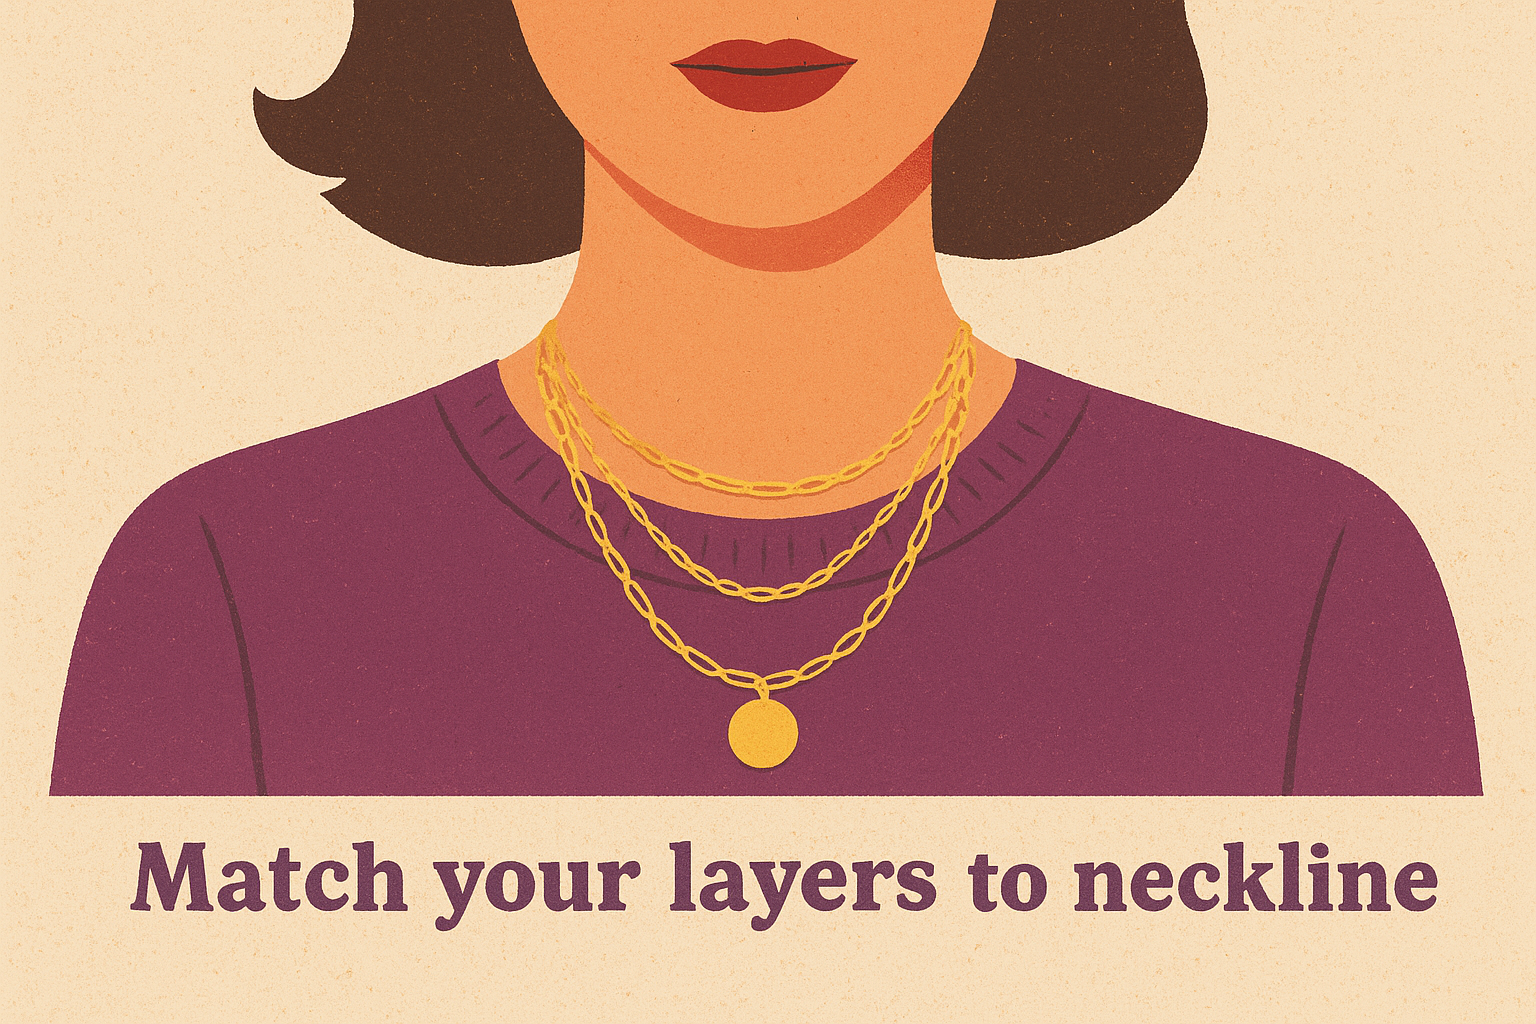
Your neckline determines how much of your layered set is actually visible, so build your combination around what the neckline shows rather than what looks good in isolation.
Use this table to match your layering setup to the neckline you're wearing:
| Neckline | Recommended layers | What to avoid |
|---|---|---|
| Crew neck | 16", 18", 20" | Anything longer than 22" disappears |
| V-neck | 16", 20", 24" | Chokers that fight the V shape |
| Scoop neck | 18", 22", 26" | Stacking all layers above the scoop line |
| Off-shoulder | 20", 24", 28" | Short chokers that look disconnected |
| Turtleneck | 24", 28", 32" | Any layer shorter than 22" hidden by fabric |
| Strapless | 14", 18", 22" | Over-layering that competes with the bust line |
Adjust your layering for the occasion
Casual outfits pair best with lighter, thinner chains across all three layers so the combination doesn't visually overpower a simple t-shirt or tank top. Keep your focal piece subtle, a small charm or a minimalist pendant rather than a large statement piece, and stick to two layers instead of three if your outfit is already carrying a lot of visual texture like a pattern or embroidery.
For a more dressed-up look, you have more room to work with. Thicker chains, a stronger focal pendant, and a deliberate metal mix all read as intentional styling choices when paired with clean, structured clothing like a blazer or a solid-color dress. Pull back to two layers if your outfit already has embellishments at the neckline, such as buttons, piping, or lace trim, so your necklaces stay in focus rather than competing with the fabric.
Fix common layering problems fast
Even when you follow the spacing rules and put your necklaces on in the right order, specific problems still show up in everyday wear. Most of them have a fast fix once you know what's actually causing them. The three issues below are the ones people run into most often with necklace layering, and each one has a direct solution you can apply the same day.
Chains that keep sliding to the back of your neck
This happens when one or more of your chains is too lightweight for its length. A long, delicate chain has very little mass pulling it downward, so it rotates freely and migrates toward the back throughout the day. The fix is simple: add a small pendant or charm to the front of the lightweight chain. The added weight at the center pulls the chain forward and keeps it oriented correctly without any clasp adjustments.
Adding even a minimal pendant to a floating chain is faster and cheaper than replacing the chain entirely.
If you don't want to add a pendant, switch that chain out for one with a slightly heavier link style, such as a rope or figaro chain, at the same length. The denser structure gives the chain enough weight to stay in place on its own.
Layers that look too similar even with different lengths
This usually comes down to matching chain styles across all layers. When every necklace uses the same cable link at a slightly different length, the spacing exists but the visual separation doesn't. Your eye reads the whole stack as one undifferentiated line rather than distinct layers.
Fix this by swapping out at least one chain for a different link style or finish. Use this quick reference to introduce variety without breaking the overall balance:
| Problem chain | Swap it for | What changes |
|---|---|---|
| Fine cable at every layer | A rope chain at one layer | Adds texture and weight variation |
| All gold, same finish | One brushed or matte finish piece | Creates contrast without changing the metal |
| All plain chains, no pendant | A small pendant on the bottom layer | Gives the eye a focal point to land on |
Changing just one element across your stack, link style, finish, or pendant presence, is usually enough to make each layer read clearly and independently.
Quick recap
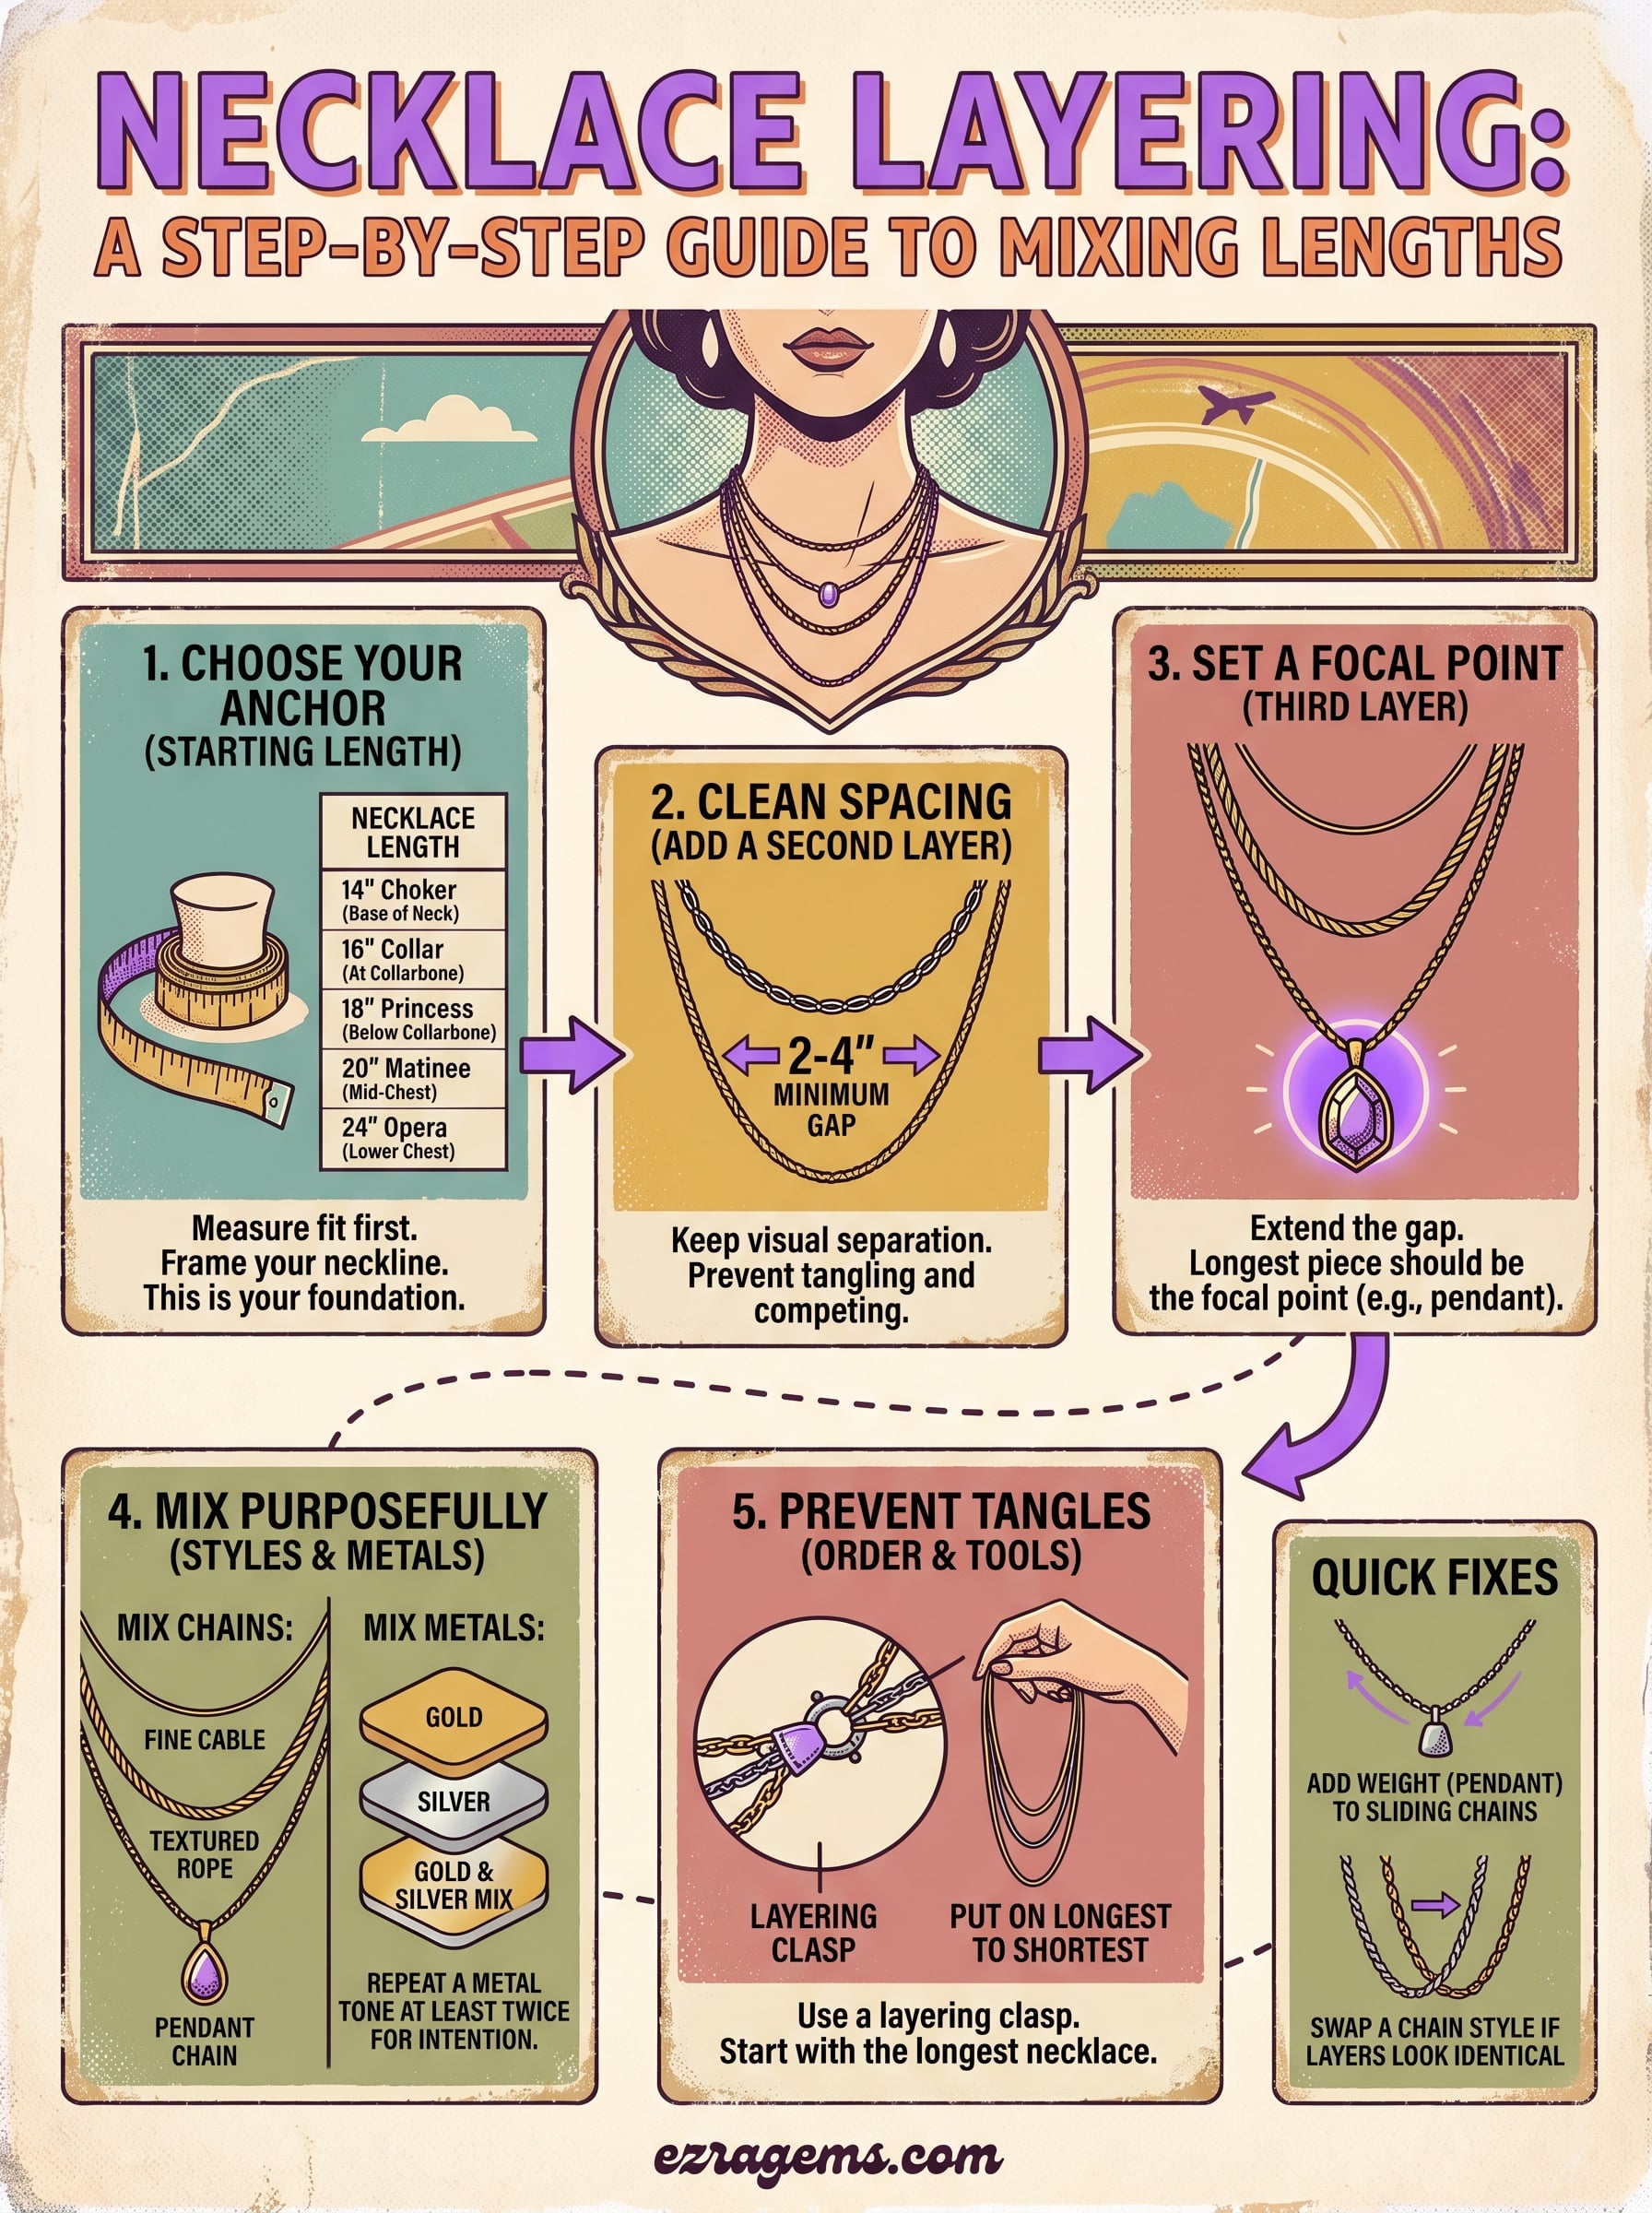
Necklace layering comes down to a handful of decisions made in the right order. Start with a single anchor necklace that fits your neckline, then add each subsequent piece with at least a 2-inch gap between layers. Mix chain styles with a clear visual logic, keep your focal point to one piece per look, and use a layering clasp to stop tangles before they start. Match your length combination to your neckline, adjust for the occasion, and swap out one element whenever two layers are reading as the same.
Every tip in this guide is something you can apply the next time you get dressed, with pieces you likely already own. If you want chains that hold up through daily wear without tarnishing or fading, browse the necklace collection at Ezra Gems for waterproof, hypoallergenic options built specifically for stacking and everyday wear.
Deje un comentario